GIS Select Data Dialog: Difference between revisions
From XMS Wiki
Jump to navigationJump to search
No edit summary |
No edit summary |
||
| Line 2: | Line 2: | ||
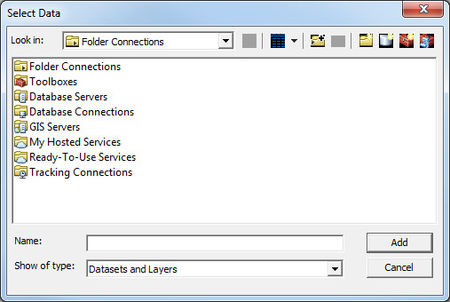
When Arc Objects® have been enabled in XMS, the '''Add Data''' command becomes available in the GIS module ''Data'' menu. Selecting this command will bring up the ''Select Data'' dialog. From this dialog, users are able to load any of the ESRI supported formats, including shapefiles, coverages, geodatabases, grids, images, CAD files and other formats, as GIS data layers. | When Arc Objects® have been enabled in XMS, the '''Add Data''' command becomes available in the GIS module ''Data'' menu. Selecting this command will bring up the ''Select Data'' dialog. From this dialog, users are able to load any of the ESRI supported formats, including shapefiles, coverages, geodatabases, grids, images, CAD files and other formats, as GIS data layers. | ||
==Dialog Description== | |||
The ''Select Data'' dialog has the following options: | |||
*Up One Level | |||
*Contents View Type | |||
*Connect to Folder | |||
*Disconnect Folder | |||
*New Folder | |||
*New File Geodatabase | |||
*New Toolbox | |||
*New Python Toolbox | |||
*Name | |||
*Show of type | |||
Revision as of 17:29, 8 July 2015
When Arc Objects® have been enabled in XMS, the Add Data command becomes available in the GIS module Data menu. Selecting this command will bring up the Select Data dialog. From this dialog, users are able to load any of the ESRI supported formats, including shapefiles, coverages, geodatabases, grids, images, CAD files and other formats, as GIS data layers.
Dialog Description
The Select Data dialog has the following options:
- Up One Level
- Contents View Type
- Connect to Folder
- Disconnect Folder
- New Folder
- New File Geodatabase
- New Toolbox
- New Python Toolbox
- Name
- Show of type
