WMS:Feature Objects Menu
The Feature Objects menu has the following commands:
Delete
The Delete command will delete all feature objects and any unsaved data.
Coverage Properties
The Coverage Properties command will bring up a Properties dialog. From the Coverage Properties dialog the model coverage can be can be changed. Information about feature objects built in the coverage can also be viewed in this dialog.

Attributes
The attributes of feature objects depend on the type of feature selected (point, line, or polygon) and the coverage to which it belongs. Many coverages are polygonal only (i.e. land use, soil, area property) and so the only kind of feature object that has attributes are the polygons. Other coverages, like cross sections or time computation arcs only have attributes for the lines. When selecting the Attributes command in the Feature Objects menu, the attributes dialog of the currently selected feature object will appear. It is also possible to invoke the attributes dialog by double-clicking on the desire feature object.
See the coverages listing to read more about the kinds of attributes that feature objects have for each coverage type.
Vertex to Node
The Vertex ↔ Node command in the Feature Objects menu can be used to create a node from a vertex or a vertex from a node (providing the node is connected to only two arcs). Vertices only define the geometry of the arc whereas nodes define the beginning and ending of an arc. Therefore when converting a vertex to a node the arc to which the vertex belongs is split into two separate arcs at the selected vertex. Likewise, when a node is converted to a vertex the two arcs attached to the node are merged into a single arc (if more than two arcs are attached to a node it cannot be converted to a vertex).
When converting a vertex to a drainage outlet for a DEM the vertex is automatically converted to a node first and then the attribute type is set to drainage outlet.
Cleaning

The Clean command in the Feature Objects menu is used to clean up feature object data. Specifically, it prompts for a snapping tolerance and minimum dangling arc length, and then uses these parameters to do the following:
- A check is made to see if any nodes are within tolerance of other nodes. If so, the nodes are snapped together.
- A check is made to see if any arcs intersect. If so a node is created at the intersection and the arcs are split.
- A check is made for dangling arcs (arcs with one end not connected to another arc) with a minimum length. If any are found they are deleted.
All objects of the active coverage will be cleaned.
Alternatively, a check is made to see if any arcs, vertices, nodes, or points are selected in the active coverage. If any intersecting arcs are selected, there is the option of intersecting only the selected arcs. If any points, nodes, or vertices are selected, snap the selected points, nodes, and vertices to a snapping point that is selected after the Clean Options dialog is closed.
Build Polygons
Just defining a series of arcs that form a closed loop, or polygon, does not create a polygon. Polygons are created from arcs only after the Build Polygons command in the Feature Objects menu is used. Feature polygons can be created in one of two ways:
- If there are no selected arcs when the Build Polygons command is chosen, polygons are created for all arcs of the active coverage that form closed loops, or polygons. The one exception being that if the active coverage is a “drainage” type coverage, stream arcs are not used to create polygons. If wanting a stream arc to also form a basin boundary, then build polygons according to method two below.
- If there are selected arcs when the Build Polygons command is chosen then polygons are only created for closed loops or polygons formed by the set of selected arcs.
By either method, the new polygon inherits the current default polygon type, unless in the drainage cover and then the new polygon will be defaulted to a lake polygon if all it's arcs are lake arcs and a drainage polygon otherwise.
Redistribute

Vertices along arcs can be redistributed at either a higher or lower density using the Redistribute command in the Feature Objects menu. The vertex density along arcs determines the density of TIN vertices when issuing the Create TIN command from the Feature Objects menu. Vertices are redistributed along all selected arcs using a uniform or cubic spline method. Arcs can be selected one at a time using the Select Arc tool, the Select All command in the Edit menu (the Select Arc tool must be active), the Select Branch tool, or the Select Network tool. Once the arcs are selected the method of redistribution can be chosen from the Redistribute dialog.
Uniform Subdivision
If the Subdivide each end uniformly options is specified then either a number of intervals, or a specified spacing can be given to determine how points are redistributed along the selected arcs. If the specified spacing is greater than the length between adjacent arc vertices, the vertices are moved to reflect this larger spacing.
Spline Redistribution
If the Redistribute along a cubic spline option is specified vertices between arcs are redistributed by creating a series of splines from the vertices of selected arcs and then redistributing a new set of vertices at the specified distance. If the flag for preserving points with an angle greater than the specified angle is checked then vertices at such locations will remain after the redistribution. This method can be used to create vertices at a smaller density (specify a larger target spacing) as well as a higher density.
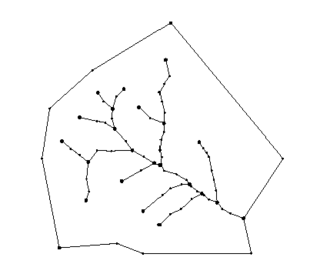
Arcs before redistribution
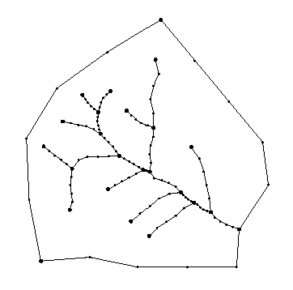
Arcs with a constant interval of 5

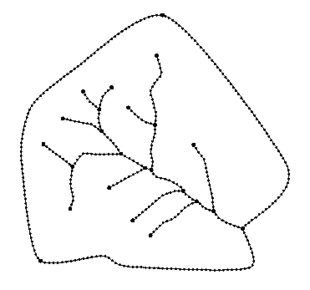
Arcs with a constant spacing of 100
Arcs with a splined redistribution


Arcs → Breaklines
Arcs → TIN Vertices
Create TIN
See the article Creating TINs for more information on this command.
Create Grid

A grid can be created from a feature polygon using the Create Grid command in the Feature Objects menu when using the Map Module or selecting Create Grid from the Grids menu when the 2-D Grid Module. Either command will bring up the Create Grid dialog. Active and inactive cells are determined from the boundary polygon. A rectangular grid is created that encompasses the bounds of the boundary polygon and cells outside the polygon are assigned an inactive status. Either an existing TIN or a DEM can be used as a background elevation map when interpolating z values for the elevation dataset of the grid.

Reorder Streams
The Reorder Streams command in the Feature Objects menu is used to ensure that the direction of all stream arcs are consistently defined from a selected outlet node. When creating stream arcs in WMS a check is made to ensure that points are created from downstream to upstream, so that the first node in the arc is the downstream node. This makes it impossible to create streams in WMS that do not follow this definition. However, when arcs are imported it is possible to create streams where the downstream node is second rather than first for some arcs but not others. All arcs can be consistently ordered by selecting an outlet node (a node attached to only one arc) and then choosing the Reorder Streams command.
Reverse Directions
The Reverse Directions command can be used to reverse the direction of selected arcs. This is used for stream type arcs where the direction of connectivity is important. Stream arcs must always be defined by connecting point from downstream to upstream. If an error was made when creating the points this command can be used to correct it. An arrow is drawn on all arcs from upstream to downstream and can be used to verify that directions are correct.
Node to Flow Arcs
The Node → Flow Arcs command requires the "Time Computation" coverage have been created and a DEM dataset must have been loaded into WMS.
Stream to Flow Arcs
The Stream → Flow Arcs command requires the "Time Computation" coverage have been created.
Compute Basin Data
After defining basin boundaries, attributes such as basin areas, slopes, and stream lengths can be computed using the Compute Basin Data command. These attributes are all geometric parameters used in defining basins and routing networks in HEC-1, TR-20, and other hydrologic models. If the basins are changed in any way, the drainage data must be recomputed using this command. When computing basin data the model units and the parameter units must be specified. The only choices available for model units are feet and meters whereas the parameter for area include square miles, square kilometers, and acres, and for distance include mile, kilometer, feet, and meters. A complete definition of the different geometric attributes computed and how they may be used to compute travel times (lag time, time of concentration) is given in the Hydrologic/Hydraulic Calculations page.
The Compute Basin Data command brings up a Units dialog.
Compute Gage Weights
This command will open the Compute Gage Weight dialog where the cell size for weight computation can be entered. Gages must exist in the Hydrologic module before this command is available. See Gages.

Related Topics
WMS – Watershed Modeling System | ||
|---|---|---|
| Modules: | Terrain Data • Drainage • Map • Hydrologic Modeling • River • GIS • 2D Grid • 2D Scatter |  |
| Models: | CE-QUAL-W2 • GSSHA • HEC-1 • HEC-HMS • HEC-RAS • HSPF • MODRAT • NSS • OC Hydrograph • OC Rational • Rational • River Tools • Storm Drain • SMPDBK • SWMM • TR-20 • TR-55 | |
| Toolbars: | Modules • Macros • Units • Digitize • Static Tools • Dynamic Tools • Drawing • Get Data Tools | |
| Aquaveo | ||